No edit summary |
mNo edit summary Tag: Visual edit |
||
| (21 intermediate revisions by 7 users not shown) | |||
| Line 1: | Line 1: | ||
| − | {{Spoiler|color=#f9be03}} |
||
{{PageTheme|arc-shie_hassaikai}} |
{{PageTheme|arc-shie_hassaikai}} |
||
{{Event Infobox |
{{Event Infobox |
||
| Line 6: | Line 5: | ||
|next = [[Provisional Hero License Course]] |
|next = [[Provisional Hero License Course]] |
||
|name = Shie Hassaikai Raid |
|name = Shie Hassaikai Raid |
||
| − | |image = |
+ | |image = Shudder! The Underground Labyrinth.png |
|arc = Shie Hassaikai |
|arc = Shie Hassaikai |
||
|location = [[Shie Hassaikai Compound]] |
|location = [[Shie Hassaikai Compound]] |
||
| Line 38: | Line 37: | ||
*[[Himiko Toga]] |
*[[Himiko Toga]] |
||
*[[Jin Bubaigawara]] |
*[[Jin Bubaigawara]] |
||
| − | |manga= [[Chapter 137]]-[[Chapter 159|159]] |
+ | |manga= [[Chapter 137]] - [[Chapter 159|159]] |
| − | |anime = [[Episode 70]]- |
+ | |anime = [[Episode 70]] - [[Episode 77|77]] |
}} |
}} |
||
The '''Shie Hassaikai Raid''' is a Police Raid where the [[Hero Office|Hero Agencies]] of [[Mirai Sasaki|Sir Nighteye]], [[Taishiro Toyomitsu|Fat Gum]], and [[Ryuko Tatsuma|Ryukyu]] combined with other [[Heroes|Pro Heroes]] and the [[Police Force]] to seize the [[Shie Hassaikai Compound]] to rescue [[Eri]] and arrest [[Kai Chisaki|Overhaul]]. |
The '''Shie Hassaikai Raid''' is a Police Raid where the [[Hero Office|Hero Agencies]] of [[Mirai Sasaki|Sir Nighteye]], [[Taishiro Toyomitsu|Fat Gum]], and [[Ryuko Tatsuma|Ryukyu]] combined with other [[Heroes|Pro Heroes]] and the [[Police Force]] to seize the [[Shie Hassaikai Compound]] to rescue [[Eri]] and arrest [[Kai Chisaki|Overhaul]]. |
||
| Line 73: | Line 72: | ||
! |
! |
||
<gallery position="center" columns="2" widths="100" spacing="small" captionalign="center" bordercolor="#f9be03" bordersize="medium" hideaddbutton="true" navigation="true"> |
<gallery position="center" columns="2" widths="100" spacing="small" captionalign="center" bordercolor="#f9be03" bordersize="medium" hideaddbutton="true" navigation="true"> |
||
| − | Sir Nighteye Manga Portrait 2.png|Sir Nighteye|link= |
+ | Sir Nighteye Manga Portrait 2.png|Sir Nighteye|link=Mirai Sasaki |
Deku Manga Portrait.png|Deku|link=Izuku Midoriya |
Deku Manga Portrait.png|Deku|link=Izuku Midoriya |
||
Lemillion Manga Portrait 2.png|Lemillion|link=Mirio Togata |
Lemillion Manga Portrait 2.png|Lemillion|link=Mirio Togata |
||
| Line 101: | Line 100: | ||
<gallery position="center" columns="2" widths="100" spacing="small" captionalign="center" bordercolor="#f9be03" bordersize="medium" hideaddbutton="true" navigation="true"> |
<gallery position="center" columns="2" widths="100" spacing="small" captionalign="center" bordercolor="#f9be03" bordersize="medium" hideaddbutton="true" navigation="true"> |
||
Ryukyu Volume 22 Portrait.png|Ryukyu|link=Ryuko Tatsuma |
Ryukyu Volume 22 Portrait.png|Ryukyu|link=Ryuko Tatsuma |
||
| − | Nejire Hado Manga Portrait.png|Nejire |
+ | Nejire Hado Manga Portrait.png|Nejire Chan|link=Nejire Hado |
Ochaco Uraraka Manga Portrait.png|Uravity|link=Ochaco Uraraka |
Ochaco Uraraka Manga Portrait.png|Uravity|link=Ochaco Uraraka |
||
Tsuyu Asui Manga Portrait.png|Froppy|link=Tsuyu Asui |
Tsuyu Asui Manga Portrait.png|Froppy|link=Tsuyu Asui |
||
| Line 121: | Line 120: | ||
! |
! |
||
<gallery position="center" columns="1" widths="200" spacing="small" captionalign="center" bordercolor="#f9be03" bordersize="medium" hideaddbutton="true"> |
<gallery position="center" columns="1" widths="200" spacing="small" captionalign="center" bordercolor="#f9be03" bordersize="medium" hideaddbutton="true"> |
||
| − | + | Toya, Yu & Soramitsu.png|Setsuno, Hojo & Tabe |
|
</gallery> |
</gallery> |
||
! |
! |
||
| Line 133: | Line 132: | ||
! |
! |
||
<gallery position="center" columns="1" widths="200" spacing="small" captionalign="center" bordercolor="#f9be03" bordersize="medium" hideaddbutton="true"> |
<gallery position="center" columns="1" widths="200" spacing="small" captionalign="center" bordercolor="#f9be03" bordersize="medium" hideaddbutton="true"> |
||
| − | + | Spear and Shield Combo.png|Spear and Shield Combo |
|
</gallery> |
</gallery> |
||
! |
! |
||
| Line 144: | Line 143: | ||
! |
! |
||
<gallery position="center" columns="1" widths="200" spacing="small" captionalign="center" bordercolor="#f9be03" bordersize="medium" hideaddbutton="true"> |
<gallery position="center" columns="1" widths="200" spacing="small" captionalign="center" bordercolor="#f9be03" bordersize="medium" hideaddbutton="true"> |
||
| − | + | Temp Squad.png|"Twoga" Temp Squad |
|
</gallery> |
</gallery> |
||
! |
! |
||
| Line 155: | Line 154: | ||
! |
! |
||
<gallery position="center" columns="1" widths="200" spacing="small" captionalign="center" bordercolor="#f9be03" bordersize="medium" hideaddbutton="true"> |
<gallery position="center" columns="1" widths="200" spacing="small" captionalign="center" bordercolor="#f9be03" bordersize="medium" hideaddbutton="true"> |
||
| − | + | Shin_Nemoto_&_Deidoro_Sakaki_Team-up.png|Nemoto & Sakaki |
|
| + | |Nemoto & Sakaki |
||
</gallery> |
</gallery> |
||
! |
! |
||
| Line 166: | Line 166: | ||
! |
! |
||
<gallery position="center" columns="1" widths="200" spacing="small" captionalign="center" bordercolor="#f9be03" bordersize="medium" hideaddbutton="true"> |
<gallery position="center" columns="1" widths="200" spacing="small" captionalign="center" bordercolor="#f9be03" bordersize="medium" hideaddbutton="true"> |
||
| − | + | Mimic_real_body_-_Joi_Irinaka.png|Mimic |
|
</gallery> |
</gallery> |
||
! |
! |
||
| Line 176: | Line 176: | ||
! |
! |
||
<gallery position="center" columns="1" widths="200" spacing="small" captionalign="center" bordercolor="#f9be03" bordersize="medium" hideaddbutton="true"> |
<gallery position="center" columns="1" widths="200" spacing="small" captionalign="center" bordercolor="#f9be03" bordersize="medium" hideaddbutton="true"> |
||
| − | + | Lemillion_confronts_Overhaul_and_Chronostasis.png|Overhaul & Chronostasis |
|
</gallery> |
</gallery> |
||
! |
! |
||
| Line 187: | Line 187: | ||
==Incident== |
==Incident== |
||
| − | [[File:Ryuko Dragon Form Anime.png|thumb|Ryukyu reveals her dragon form.]] |
+ | [[File:Ryuko Dragon Form Anime.png|220px|thumb|Ryukyu reveals her dragon form.]] |
Just as the Police prepare to enter the large residence, [[Rikiya Katsukame]] bursts through the door with a giant right hook. Two men get flown high into the air but Deku and Eraser Head are able to secure them. Rikiya is surprised the Heroes got wind of the Shie Hassaikai's themes. He attacks but is met with [[Ryuko Tatsuma|Ryukyu]]'s [[Dragon|powerful dragon-shifting Quirk]]. Team Ryukyu engages the giant villain while the others storm the base. |
Just as the Police prepare to enter the large residence, [[Rikiya Katsukame]] bursts through the door with a giant right hook. Two men get flown high into the air but Deku and Eraser Head are able to secure them. Rikiya is surprised the Heroes got wind of the Shie Hassaikai's themes. He attacks but is met with [[Ryuko Tatsuma|Ryukyu]]'s [[Dragon|powerful dragon-shifting Quirk]]. Team Ryukyu engages the giant villain while the others storm the base. |
||
| Line 196: | Line 196: | ||
Lemillion slips through a distorted wall and confirms they haven't run into a dead end. Deku and [[Eijiro Kirishima|Red Riot]] use their [[One For All: Full Cowl - Shoot Style|Shoot Style]] and [[Red Gauntlet]] [[Super Move]]s to break down the wall and open the path. However, the path has been warped and distorted by yet another Quirk. This time, it's [[Joi Irinaka|Mimic]] of the Shie Hassaikai using his [[Mimicry]] Quirk to merge with the path and warp it. Tamaki starts to panic about being unable to continue on but Mirio reassures him and goes ahead by phasing through the path. |
Lemillion slips through a distorted wall and confirms they haven't run into a dead end. Deku and [[Eijiro Kirishima|Red Riot]] use their [[One For All: Full Cowl - Shoot Style|Shoot Style]] and [[Red Gauntlet]] [[Super Move]]s to break down the wall and open the path. However, the path has been warped and distorted by yet another Quirk. This time, it's [[Joi Irinaka|Mimic]] of the Shie Hassaikai using his [[Mimicry]] Quirk to merge with the path and warp it. Tamaki starts to panic about being unable to continue on but Mirio reassures him and goes ahead by phasing through the path. |
||
| − | [[File: |
+ | [[File:Suneater counterattacks.png|thumb|left|220px|Suneater takes on Toya, Yu, and Soramitsu.]] |
Mimic drops the rest of the group one floor below where [[Toya Setsuno]], [[Yu Hojo]] & [[Soramitsu Tabe]] are waiting to ambush them. Suneater realizes the villains are trying to buy Overhaul time and resolves to face the villains alone while the others go ahead.{{Ref|chap=139}} Eijiro pleads with Tamaki to fight with the team and then the villain's attack. They pull out weapons after having their Quirks stolen from them by Eraser Head. The Police pull out their firearms and panic, but Suneater swoops in and defuses the situation. He ties up the criminal trial and asks the others to go on without him. |
Mimic drops the rest of the group one floor below where [[Toya Setsuno]], [[Yu Hojo]] & [[Soramitsu Tabe]] are waiting to ambush them. Suneater realizes the villains are trying to buy Overhaul time and resolves to face the villains alone while the others go ahead.{{Ref|chap=139}} Eijiro pleads with Tamaki to fight with the team and then the villain's attack. They pull out weapons after having their Quirks stolen from them by Eraser Head. The Police pull out their firearms and panic, but Suneater swoops in and defuses the situation. He ties up the criminal trial and asks the others to go on without him. |
||
Suneater allows the others to continue the mission while he fights Toya, Yu, and Soramitsu alone. Suneater controls the fight early but Toya and Yu push back when their Quirks return.{{Ref|chap=140}} Suneater stays strong by going past his limit and using his Super Move: [[Chimera Kraken]]. Soramitsu wakes up having been knocked out by Eraser Head and turns the tide of the fight into the villain's favor. Suneater channels inspiration from Mirio's dedication and makes a comeback victory over the trio of expendable bullets.{{Ref|chap=141}} |
Suneater allows the others to continue the mission while he fights Toya, Yu, and Soramitsu alone. Suneater controls the fight early but Toya and Yu push back when their Quirks return.{{Ref|chap=140}} Suneater stays strong by going past his limit and using his Super Move: [[Chimera Kraken]]. Soramitsu wakes up having been knocked out by Eraser Head and turns the tide of the fight into the villain's favor. Suneater channels inspiration from Mirio's dedication and makes a comeback victory over the trio of expendable bullets.{{Ref|chap=141}} |
||
| − | [[File:Fat Gum |
+ | [[File:Fat Gum defeats Rappa & Tengai.gif|thumb|220px|The Heroes win the battle of Spears and Shields.]] |
Mimic slows down the Police mob on the upper floors, allowing Nighteye and Fat Gum's squads to traverse further into the labyrinth. Mimic notices that Toya, Yu, and Soramitsu have been defeated and is surprised because they had considerable abilities as a team. He turns his attention to Eraser Head and attacks him using the walls of the tunnel. Fat Gum and Red Riot save him and end up tumbling down a hole to another room where [[Kendo Rappa]] and [[Hekiji Tengai]] await them. |
Mimic slows down the Police mob on the upper floors, allowing Nighteye and Fat Gum's squads to traverse further into the labyrinth. Mimic notices that Toya, Yu, and Soramitsu have been defeated and is surprised because they had considerable abilities as a team. He turns his attention to Eraser Head and attacks him using the walls of the tunnel. Fat Gum and Red Riot save him and end up tumbling down a hole to another room where [[Kendo Rappa]] and [[Hekiji Tengai]] await them. |
||
| Line 208: | Line 208: | ||
Mimic turns his attention back to Nighteye's group and tries to crush them using the cave walls. Rock Lock's [[Lock Down|Quirk]] keeps an area around the team stable, allowing them to traverse slowly forward. Mimic's Quirk is putting great strain on his body and didn't use this type of attack until he felt he had no other choice. Mimic changes the shape of the cave to let in a temporary squad created from members of the League of Villains: [[Himiko Toga]] & [[Jin Bubaigawara|Twice]].{{Ref|chap=147}} |
Mimic turns his attention back to Nighteye's group and tries to crush them using the cave walls. Rock Lock's [[Lock Down|Quirk]] keeps an area around the team stable, allowing them to traverse slowly forward. Mimic's Quirk is putting great strain on his body and didn't use this type of attack until he felt he had no other choice. Mimic changes the shape of the cave to let in a temporary squad created from members of the League of Villains: [[Himiko Toga]] & [[Jin Bubaigawara|Twice]].{{Ref|chap=147}} |
||
| − | [[File: |
+ | [[File:Himiko ambushes Rock Lock.png|thumb|left|220px|The League of Villains join the fray.]] |
Himiko injures Rock Lock and Twice attacks Sir Nighteye and the Police using a clone of Kendo. Nighteye makes short work of the clone and forces Twice to retreat. Himiko and Twice regroup and decide they're free to act on their own.{{Ref|chap=148}} Himiko and Twice use the heroes to their advantage, giving away Mimic's position in the walls by taunting him to the point of a temper tantrum. Deku and Eraser Head defeat Mimic and the League members escape, satisfied with themselves. |
Himiko injures Rock Lock and Twice attacks Sir Nighteye and the Police using a clone of Kendo. Nighteye makes short work of the clone and forces Twice to retreat. Himiko and Twice regroup and decide they're free to act on their own.{{Ref|chap=148}} Himiko and Twice use the heroes to their advantage, giving away Mimic's position in the walls by taunting him to the point of a temper tantrum. Deku and Eraser Head defeat Mimic and the League members escape, satisfied with themselves. |
||
| − | Lemillion manages to catch up with Overhaul and [[Hari Kurono|Chronostasis]] before they escape.{{Ref|chap=149}} [[Shin Nemoto]] and [[Deidoro Sakaki]] ambush him while the villains take Eri away. Lemillion manages to avoid all of Shin's Quirk-Destroying Bullets |
+ | Lemillion manages to catch up with Overhaul and [[Hari Kurono|Chronostasis]] before they escape.{{Ref|chap=149}} [[Shin Nemoto]] and [[Deidoro Sakaki]] ambush him while the villains take Eri away. Lemillion manages to avoid all of Shin's Quirk-Destroying Bullets and finds his resolve despite the villain's constant verbal abuse. He defeats both the villains instantly using his [[Super Move]]: [[Phantom Menace]]. |
Mirio quickly catches up to Overhaul and attacks. He swipes Overhaul away and phases his foot through Eri's face to knock Chronostasis away as well. Lemillion takes Eri into his arms and promises to be her hero.{{Ref|chap=150}} Overhaul activates his Quirk and attacks Lemillion and Eri. He claims he can restore Eri's body to normal whenever he wants and he's sealed off any means of escape. Chrono threatens to destroy Mirio's Quirk with the Quirk-Destroying Bullets loaded into his pistol. |
Mirio quickly catches up to Overhaul and attacks. He swipes Overhaul away and phases his foot through Eri's face to knock Chronostasis away as well. Lemillion takes Eri into his arms and promises to be her hero.{{Ref|chap=150}} Overhaul activates his Quirk and attacks Lemillion and Eri. He claims he can restore Eri's body to normal whenever he wants and he's sealed off any means of escape. Chrono threatens to destroy Mirio's Quirk with the Quirk-Destroying Bullets loaded into his pistol. |
||
| − | [[File:Lemillion |
+ | [[File:Lemillion protects Eri until the end.png|220px|thumb|Lemillion protects Eri till the end.]] |
Lemillion evades all of Chrono's shots and wraps Eri in his cape. He disarms Chrono and launches a fierce counterattack that proves he's stronger than even Overhaul. Eri watches inspired that she might actually have a hero. Shin craws his way into the cave and Overhaul commands him to shoot Lemillion.{{Ref|chap=151}} |
Lemillion evades all of Chrono's shots and wraps Eri in his cape. He disarms Chrono and launches a fierce counterattack that proves he's stronger than even Overhaul. Eri watches inspired that she might actually have a hero. Shin craws his way into the cave and Overhaul commands him to shoot Lemillion.{{Ref|chap=151}} |
||
| Line 226: | Line 226: | ||
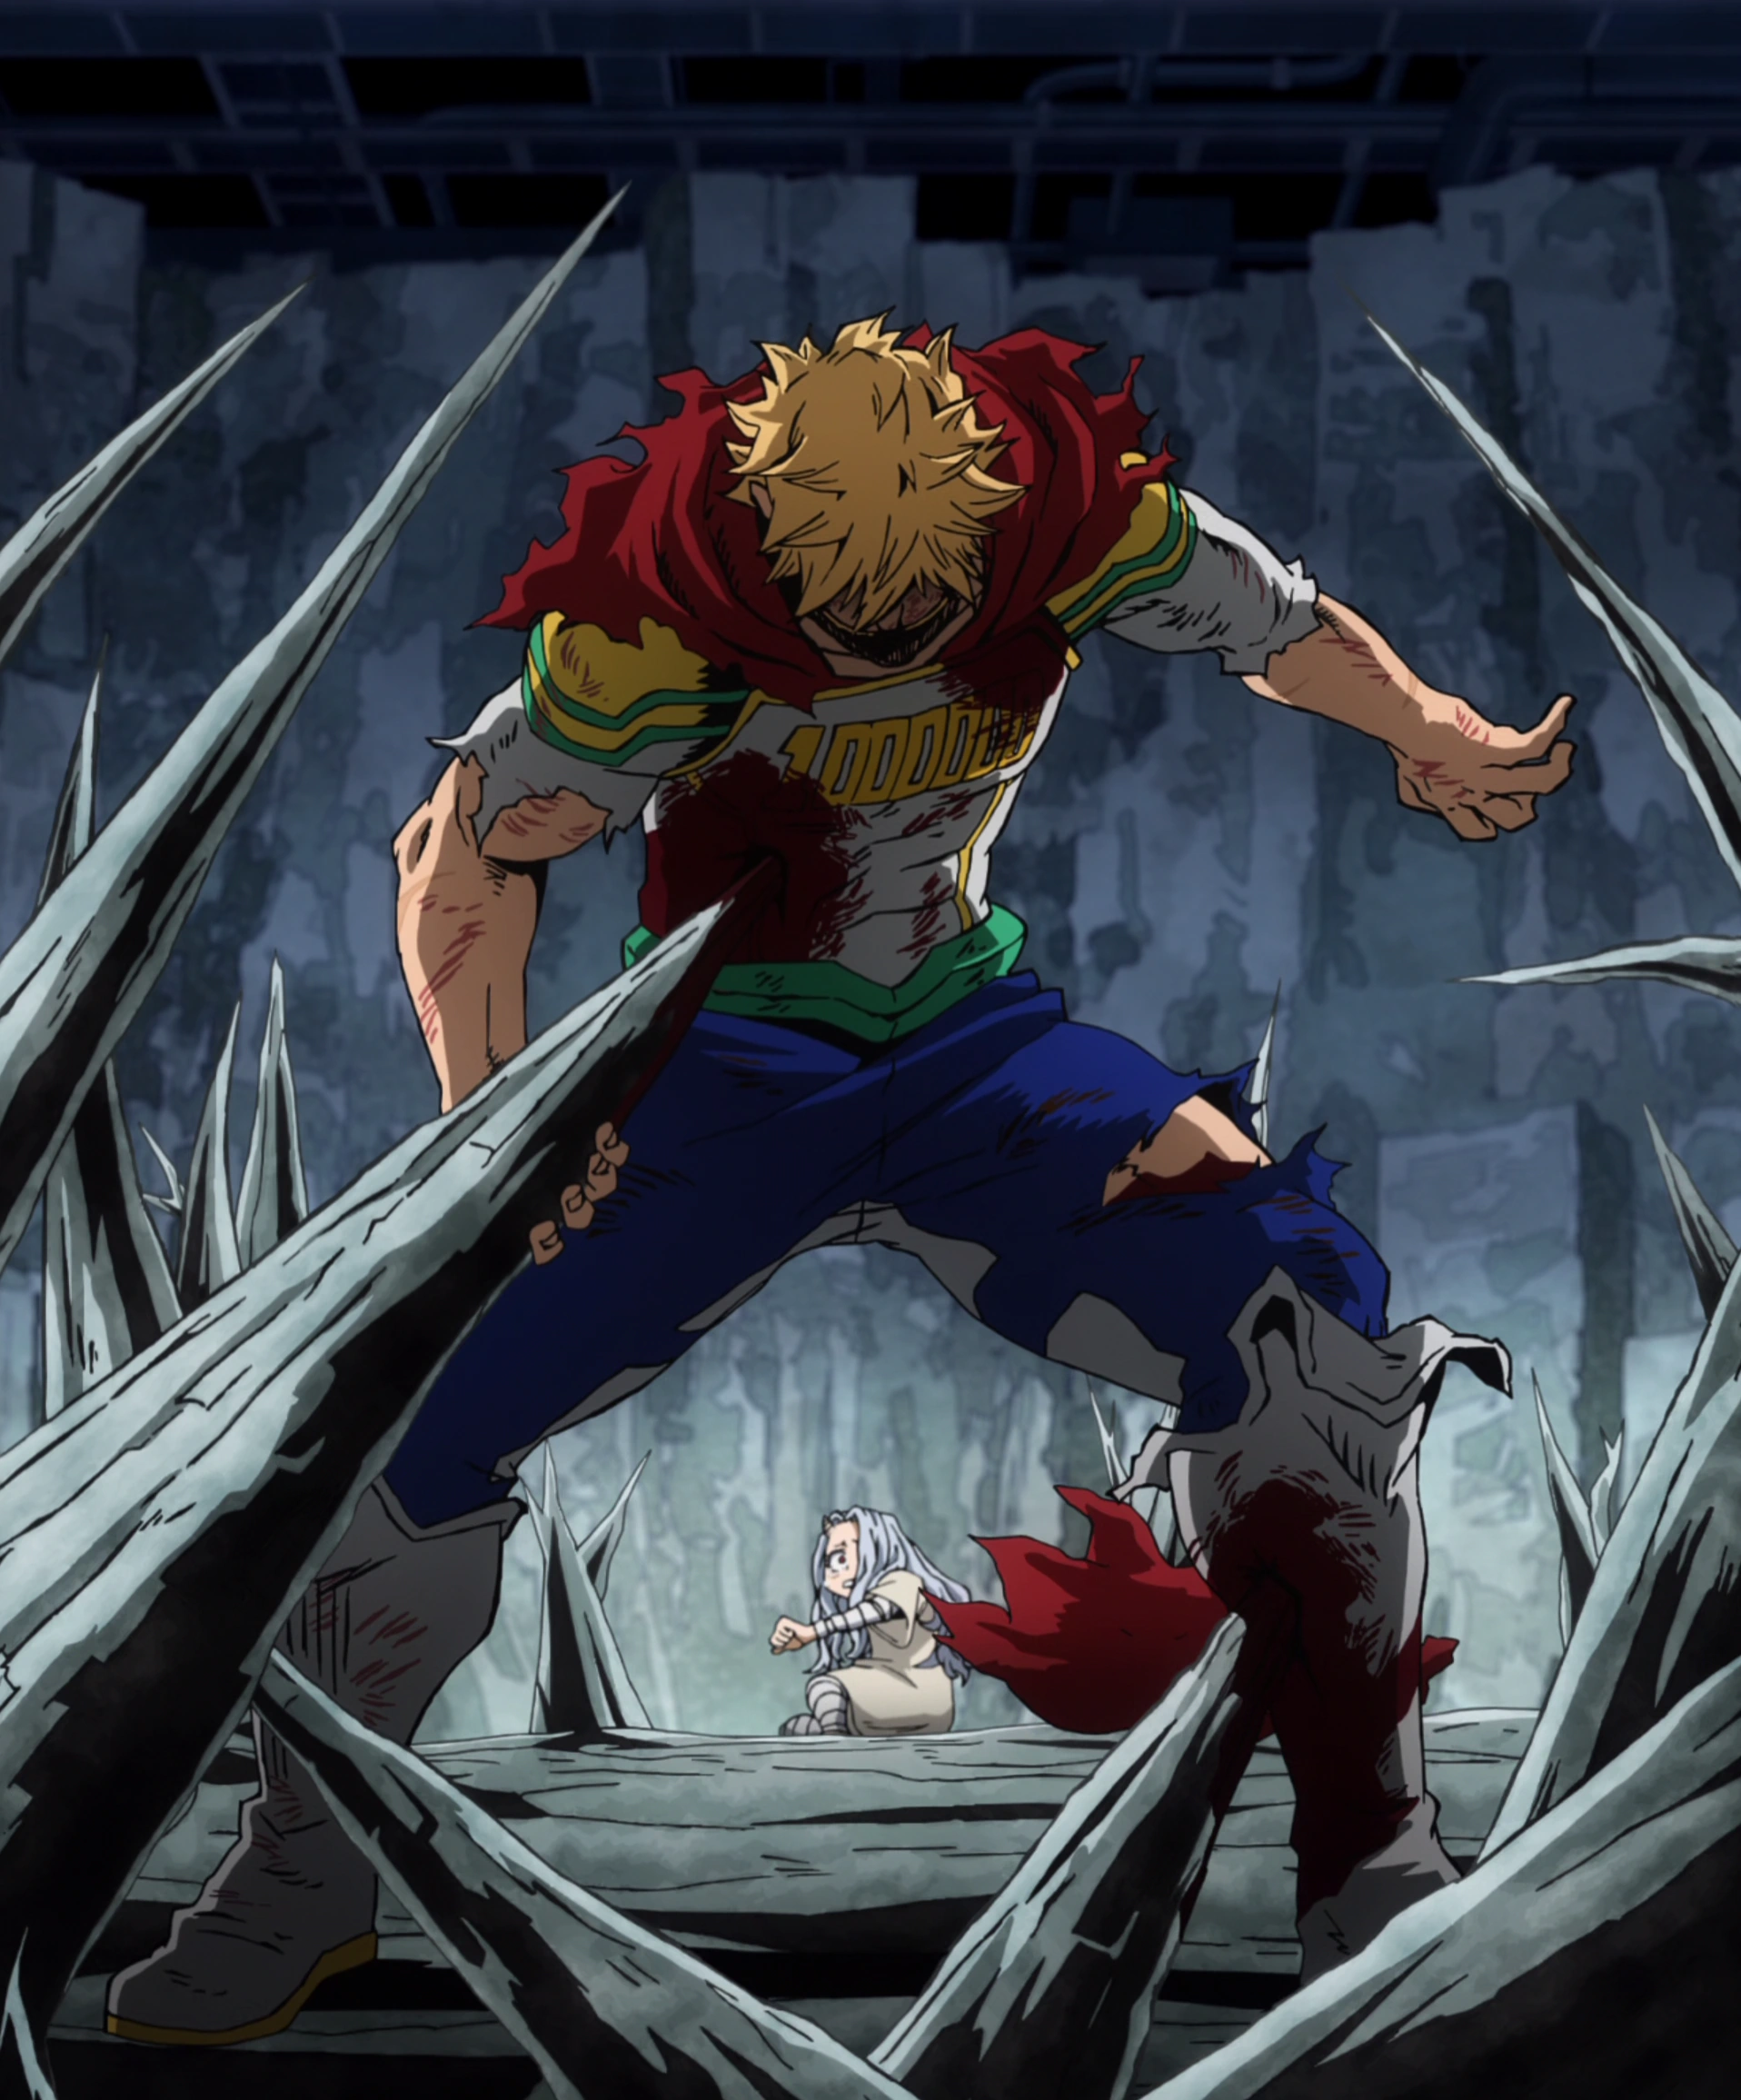
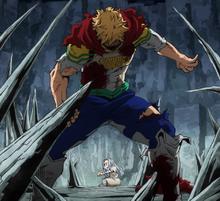
Overhaul reveals Lemillion lost his Quirk forever and Deku tries to hold Overhaul's monstrous new form back. Sir Nighteye switches places with Deku and confronts Overhaul about fearing Lemillion's power. They engage in combat while Deku tries to escort Eri and Mirio out of the cave. Nighteye sees into Overhaul's future and has a vision of him winning and fleeing with Eri. Sir Nighteye goes past his limit and Overhaul grievously injures him. Deku rushes back into the fight, determined to defy fate.{{Ref|chap=154}} |
Overhaul reveals Lemillion lost his Quirk forever and Deku tries to hold Overhaul's monstrous new form back. Sir Nighteye switches places with Deku and confronts Overhaul about fearing Lemillion's power. They engage in combat while Deku tries to escort Eri and Mirio out of the cave. Nighteye sees into Overhaul's future and has a vision of him winning and fleeing with Eri. Sir Nighteye goes past his limit and Overhaul grievously injures him. Deku rushes back into the fight, determined to defy fate.{{Ref|chap=154}} |
||
| − | [[File: |
+ | [[File:Overhaul fused with Shin manga.png|200px|left|thumb|Overhaul sacrifices his humanity to ensure his vision comes true.]] |
Deku uses 20% of One For All to combat Overhaul's second form. Despite his enhanced power, Deku proves no match for the villain and gets injured. Eri rushes out to save Deku by sacrificing herself. Before Overhaul can make a move, Ryukyu's team comes crashing through the ceiling with Rikiya.{{Ref|chap=155}} Himiko and Twice lead the Heroes to the underground cave in an attempt to defy Overhaul. Overhaul captures Eri and tries to escape through the newly formed hole in the ceiling. |
Deku uses 20% of One For All to combat Overhaul's second form. Despite his enhanced power, Deku proves no match for the villain and gets injured. Eri rushes out to save Deku by sacrificing herself. Before Overhaul can make a move, Ryukyu's team comes crashing through the ceiling with Rikiya.{{Ref|chap=155}} Himiko and Twice lead the Heroes to the underground cave in an attempt to defy Overhaul. Overhaul captures Eri and tries to escape through the newly formed hole in the ceiling. |
||
| Line 239: | Line 239: | ||
==Aftermath== |
==Aftermath== |
||
| − | [[File: |
+ | [[File:New rulers of the underworld.png|thumb|left|220px|The League of Villains get the last laugh.]] |
Following Overhaul's defeat, the Heroes and the Police finish the sweep of the headquarters and arrest all eleven members of the Shie Hassaikai. The villains are transported to a Villain hospital. Eijiro, Eri and Sir Nighteye are brought to a hospital as well. Before he's carried away, Sir Nighteye tells Deku that he managed to twist the future. |
Following Overhaul's defeat, the Heroes and the Police finish the sweep of the headquarters and arrest all eleven members of the Shie Hassaikai. The villains are transported to a Villain hospital. Eijiro, Eri and Sir Nighteye are brought to a hospital as well. Before he's carried away, Sir Nighteye tells Deku that he managed to twist the future. |
||
| Line 246: | Line 246: | ||
Snatch holds off the League of Villains until Dabi and [[Atsuhiro Sako|Mr. Compress]] kill him. Tomura takes out the remaining Policemen and takes Kai out of the transport. He and Compress remove both of Kai's arms and steal the Quirk-Destroying Bullets. Tomura adds insult to injury and mocks Kai's life's work before the League of Villains makes a dramatic exit.{{Ref|chap=160}} |
Snatch holds off the League of Villains until Dabi and [[Atsuhiro Sako|Mr. Compress]] kill him. Tomura takes out the remaining Policemen and takes Kai out of the transport. He and Compress remove both of Kai's arms and steal the Quirk-Destroying Bullets. Tomura adds insult to injury and mocks Kai's life's work before the League of Villains makes a dramatic exit.{{Ref|chap=160}} |
||
| − | [[File: |
+ | [[File:The last smile of Mirai Sasaki.png|220px|thumb|Goodnight, Sir Nighteye.]] |
| − | The incident resulted in four destroyed homes and three injured civilians. All Heroes who received injuries are admitted into the hospital. [[Nejire Hado|Nejire |
+ | The incident resulted in four destroyed homes and three injured civilians. All Heroes who received injuries are admitted into the hospital. [[Nejire Hado|Nejire Chan]] and the others remain behind to clean up the incident and aid the injured. |
Deku doesn't receive treatment for anything other than light wounds and Shota gets a few stitches. Rock Lock doesn't suffer any internal damage and Fat Gum's team is expected to make full recoveries. Eri enters a fever state and is quarantined inside the building. |
Deku doesn't receive treatment for anything other than light wounds and Shota gets a few stitches. Rock Lock doesn't suffer any internal damage and Fat Gum's team is expected to make full recoveries. Eri enters a fever state and is quarantined inside the building. |
||
| Line 257: | Line 257: | ||
*[[Ryukyu Squad vs. Rikiya Katsukame]] |
*[[Ryukyu Squad vs. Rikiya Katsukame]] |
||
*[[Tamaki Amajiki vs. Toya Setsuno, Yu Hojo & Soramitsu Tabe|Suneater vs. Setsuno, Hojo & Tabe]] |
*[[Tamaki Amajiki vs. Toya Setsuno, Yu Hojo & Soramitsu Tabe|Suneater vs. Setsuno, Hojo & Tabe]] |
||
| − | *[[Eijiro Kirishima & Taishiro Toyomitsu vs. Kendo Rappa & Hekiji Tengai| |
+ | *[[Eijiro Kirishima & Taishiro Toyomitsu vs. Kendo Rappa & Hekiji Tengai|Battle of Spears & Shields]] |
*[[Nighteye Squad vs. Himiko Toga & Jin Bubaigawara|Nighteye Squad vs. Toga & Twice]] |
*[[Nighteye Squad vs. Himiko Toga & Jin Bubaigawara|Nighteye Squad vs. Toga & Twice]] |
||
*[[Nighteye Squad vs. Joi Irinaka|Nighteye Squad vs. Mimic]] |
*[[Nighteye Squad vs. Joi Irinaka|Nighteye Squad vs. Mimic]] |
||
Revision as of 10:27, 25 February 2020
The Shie Hassaikai Raid is a Police Raid where the Hero Agencies of Sir Nighteye, Fat Gum, and Ryukyu combined with other Pro Heroes and the Police Force to seize the Shie Hassaikai Compound to rescue Eri and arrest Overhaul.
Prologue

Heroes gather for an intelligence meeting.
Sir Nighteye and his office near the climax of their investigation against Overhaul and the Shie Hassaikai. They invite Fat Gum's office, Ryukyu's office, Shota Aizawa, Rock Lock, and Gran Torino among other Pro Heroes. The hero offices also allow the U.A. High School students to participate.[1]
Since the incident when Overhaul attacked Team Reservoir Dogs, the Heroes at the Nighteye Office have been investigating the Shie Hassaikai. Centipeder notes that the Yakuza organization has been making contact with several other parties and appears to be gearing toward accumulating funds for an unknown operation. Centipeder and the Police Force confirmed that Overhaul made contact with the League of Villains and that a fight occurred.
The Nighteye office recruited Gran Torino and Naomasa Tsukauchi because they're investigating the league. Sir Nighteye also invited heroes who have experience dealing with criminals who are active on the Black Market. Fat Gum reveals to the group that the Shie Hassaikai are distributing bullets that have the ability to erase Quirks. Unlike Shota's Erasure ability, these bullets have the potential to damage a person's Quirk Factor.
Tamaki Amajiki's injuries from the previous battle healed and his Quirk returned, but this drug still holds dangerous potential. Fat Gum explains that research involving one of the confiscated bullets contained blood and human cells. This means that this drug derives from someone else's Quirk. The Shie Hassaikai are likely using middlemen organizations to deal the bullets just like they do for Trigger.
Sir Nighteye details the Shie Hassaikai and its leader Overhaul.
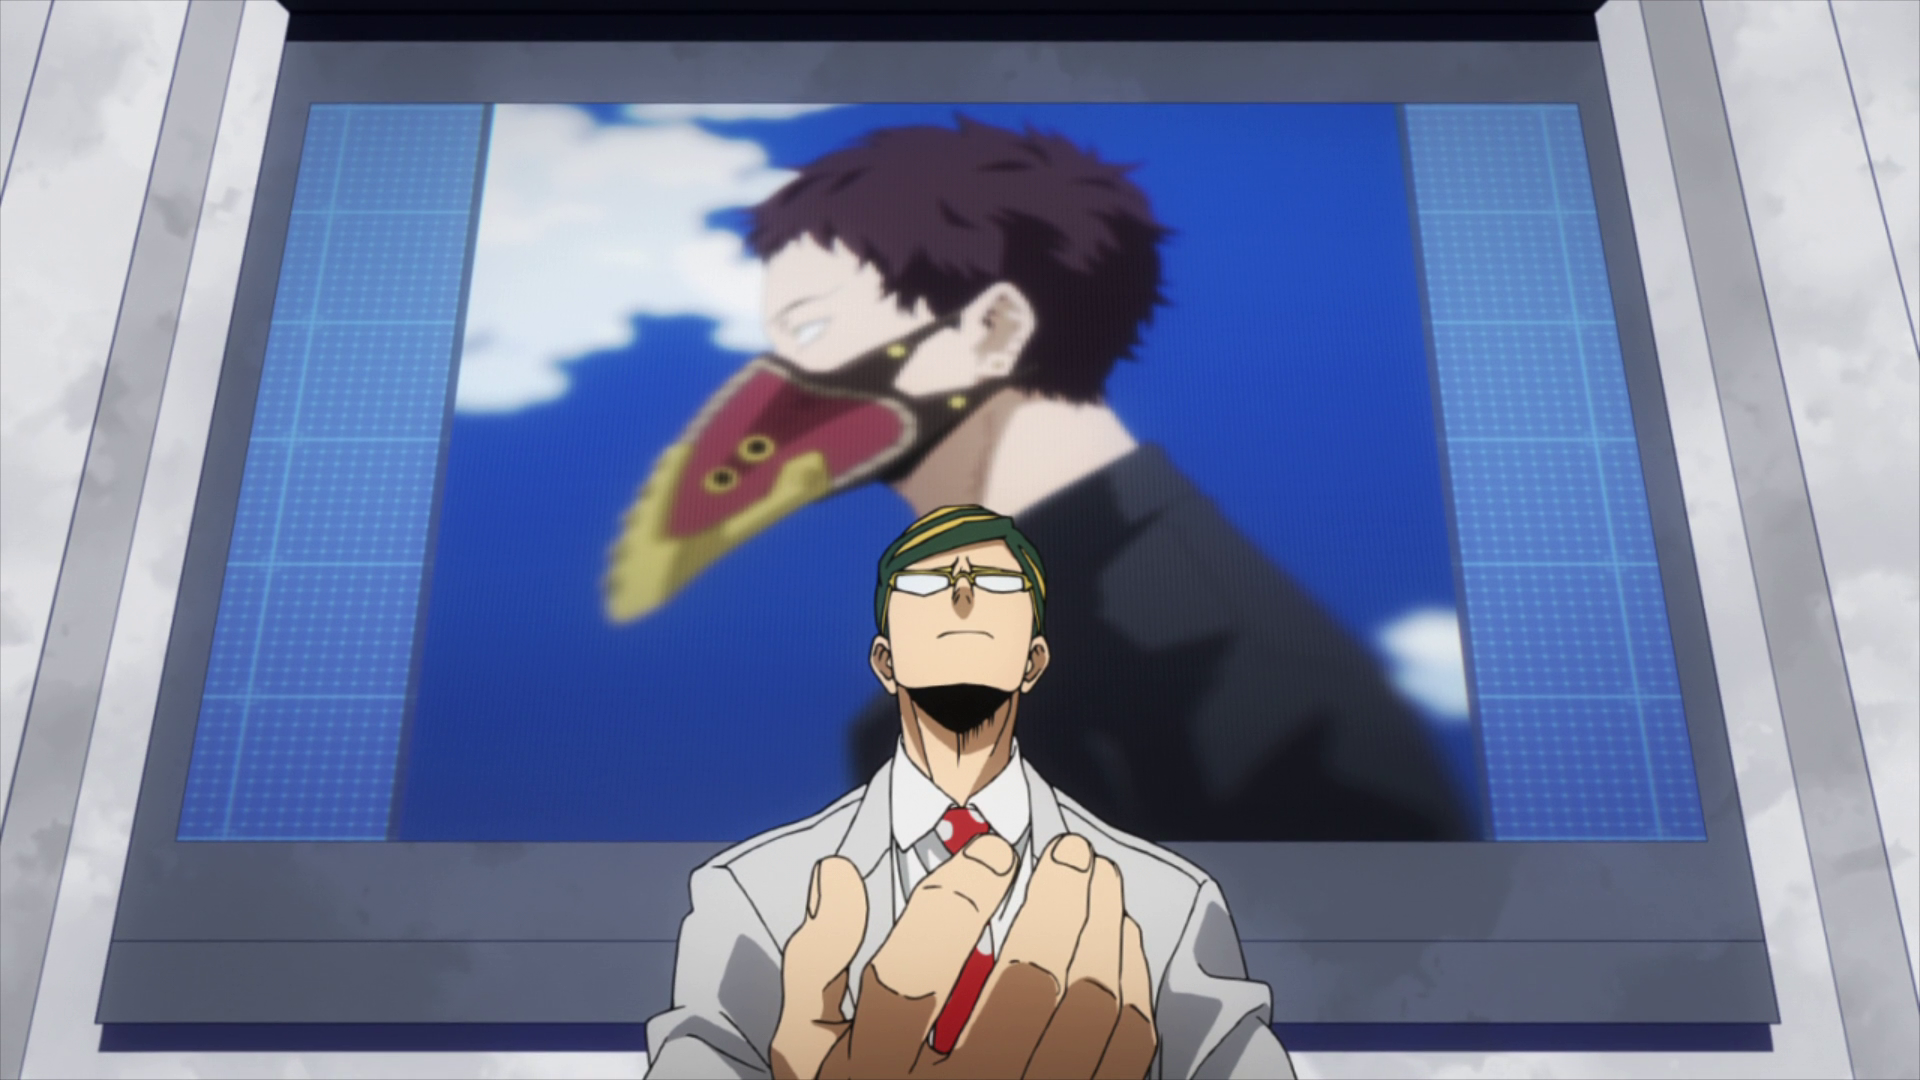
Sir Nighteye reveals that Kai Chisaki is the Yakuza Captain of the Shie Hassaikai and his Quirk ability is called Overhaul. He says that the Shie Hassaikai are armed with Quirk-Destroying Bullets and a Quirk that can disassemble and reassemble anything. The villain group has likely been distributing the test samples to gain the interest of other criminals. Sir Nighteye believes that the Quirk-Destroying Drug is made from Eri, a girl who Izuku Midoriya and Mirio Togata encountered during their Work-Study. The upcoming operation to raid the Shie Hassaikai's hideout is aimed at rescuing Eri.[2]
The Nighteye Office worked hard to gather information about the Shie Hassaikai's circle of connections and triangulated areas where Eri might be. The heroes gathered at this meeting are tasked with searching these places for the hideout and Eri. [3] The mission begins a few days later after Sir Nighteye tracks a member of the Shie Hassaikai to a toy store where he was getting presents for Eri. Bubble Girl and Centipeder were able to successfully stakeout the correct hideout and discover the proper time frame when Eri and Kai will be there.
Sir used his Foresight Quirk to confirm the location and the Police got a warrant to raid the facility. The heroes move out immediately and arrive just outside the Yakuza stronghold.[4]
Participants
| Squad | Members | Allegiance |
|---|---|---|
") Nighteye Squad |
") Sir Nighteye ") Deku ") Lemillion ") Centipeder ") Bubble Girl ") Eraser Head |
Heroes |
") Fat Gum Squad |
") Fat Gum ") Suneater ") Red Riot |
Heroes |
") Ryukyu Squad |
") Ryukyu ") Nejire Chan ") Uravity ") Froppy |
Heroes |
") Other Heroes |
Rock Lock Mr. Brave Kesagiriman |
Heroes |
") Setsuno, Hojo & Tabe |
") Toya Setsuno ") Yu Hojo ") Soramitsu Tabe |
Shie Hassaikai |
") Spear and Shield Combo |
") Kendo Rappa ") Hekiji Tengai |
Shie Hassaikai |
") "Twoga" Temp Squad |
") Toga ") Twice |
League of Villains |
") Nemoto & Sakaki |
") Shin Nemoto ") Deidoro Sakaki |
Shie Hassaikai |
") Mimic |
") Mimic |
Shie Hassaikai |
") Overhaul & Chronostasis |
") Overhaul ") Chronostasis |
Shie Hassaikai |
Incident
Ryukyu reveals her dragon form.
Just as the Police prepare to enter the large residence, Rikiya Katsukame bursts through the door with a giant right hook. Two men get flown high into the air but Deku and Eraser Head are able to secure them. Rikiya is surprised the Heroes got wind of the Shie Hassaikai's themes. He attacks but is met with Ryukyu's powerful dragon-shifting Quirk. Team Ryukyu engages the giant villain while the others storm the base.
The heroes are met with a large resistance of yakuza thugs. The smaller time heroes subdue them after a battle of Quirks. Overhaul senses the heroes fast approaching and assigns his Eight Bullets to deal with them.[3]
Sir Nighteye leads the group to Overhaul's secret escape passageway he learned of using his Foresight. Yakuza thugs ambush the Heroes, prompting Centipeder and Bubble Girl to retaliate. Centipeder uses his Centicoil technique and Bubble Girl uses her Bubble Quirk to subdue the criminals quickly. The heroes run down the stairs into an underground labyrinth that has been warped by Overhaul's Quirk.
Lemillion slips through a distorted wall and confirms they haven't run into a dead end. Deku and Red Riot use their Shoot Style and Red Gauntlet Super Moves to break down the wall and open the path. However, the path has been warped and distorted by yet another Quirk. This time, it's Mimic of the Shie Hassaikai using his Mimicry Quirk to merge with the path and warp it. Tamaki starts to panic about being unable to continue on but Mirio reassures him and goes ahead by phasing through the path.
Suneater takes on Toya, Yu, and Soramitsu.
Mimic drops the rest of the group one floor below where Toya Setsuno, Yu Hojo & Soramitsu Tabe are waiting to ambush them. Suneater realizes the villains are trying to buy Overhaul time and resolves to face the villains alone while the others go ahead.[5] Eijiro pleads with Tamaki to fight with the team and then the villain's attack. They pull out weapons after having their Quirks stolen from them by Eraser Head. The Police pull out their firearms and panic, but Suneater swoops in and defuses the situation. He ties up the criminal trial and asks the others to go on without him.
Suneater allows the others to continue the mission while he fights Toya, Yu, and Soramitsu alone. Suneater controls the fight early but Toya and Yu push back when their Quirks return.[6] Suneater stays strong by going past his limit and using his Super Move: Chimera Kraken. Soramitsu wakes up having been knocked out by Eraser Head and turns the tide of the fight into the villain's favor. Suneater channels inspiration from Mirio's dedication and makes a comeback victory over the trio of expendable bullets.[7]

The Heroes win the battle of Spears and Shields.
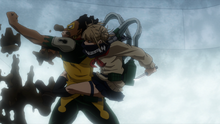
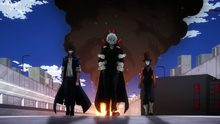
Mimic slows down the Police mob on the upper floors, allowing Nighteye and Fat Gum's squads to traverse further into the labyrinth. Mimic notices that Toya, Yu, and Soramitsu have been defeated and is surprised because they had considerable abilities as a team. He turns his attention to Eraser Head and attacks him using the walls of the tunnel. Fat Gum and Red Riot save him and end up tumbling down a hole to another room where Kendo Rappa and Hekiji Tengai await them.
Kendo makes the first move and crushes Red Riot's Super Move. Fat Gum stands up to the fearsome Spear and Shield combo while Eijiro combats his fears. [8] Eijiro feels helpless as Fat Gum and Kendo engage in a slugfest, fearing that he's powerless to help. Fat Gum has his own tricks to counter the villains but needs more time to carry it out. Eijiro fills the role of a Spear and attacks Kendo on his own. Thanks to Eijiro's manly sacrifice, Fat Gum gains the power to win the brawl of spears and shields.[9]
Mimic turns his attention back to Nighteye's group and tries to crush them using the cave walls. Rock Lock's Quirk keeps an area around the team stable, allowing them to traverse slowly forward. Mimic's Quirk is putting great strain on his body and didn't use this type of attack until he felt he had no other choice. Mimic changes the shape of the cave to let in a temporary squad created from members of the League of Villains: Himiko Toga & Twice.[10]

The League of Villains join the fray.
Himiko injures Rock Lock and Twice attacks Sir Nighteye and the Police using a clone of Kendo. Nighteye makes short work of the clone and forces Twice to retreat. Himiko and Twice regroup and decide they're free to act on their own.[11] Himiko and Twice use the heroes to their advantage, giving away Mimic's position in the walls by taunting him to the point of a temper tantrum. Deku and Eraser Head defeat Mimic and the League members escape, satisfied with themselves.
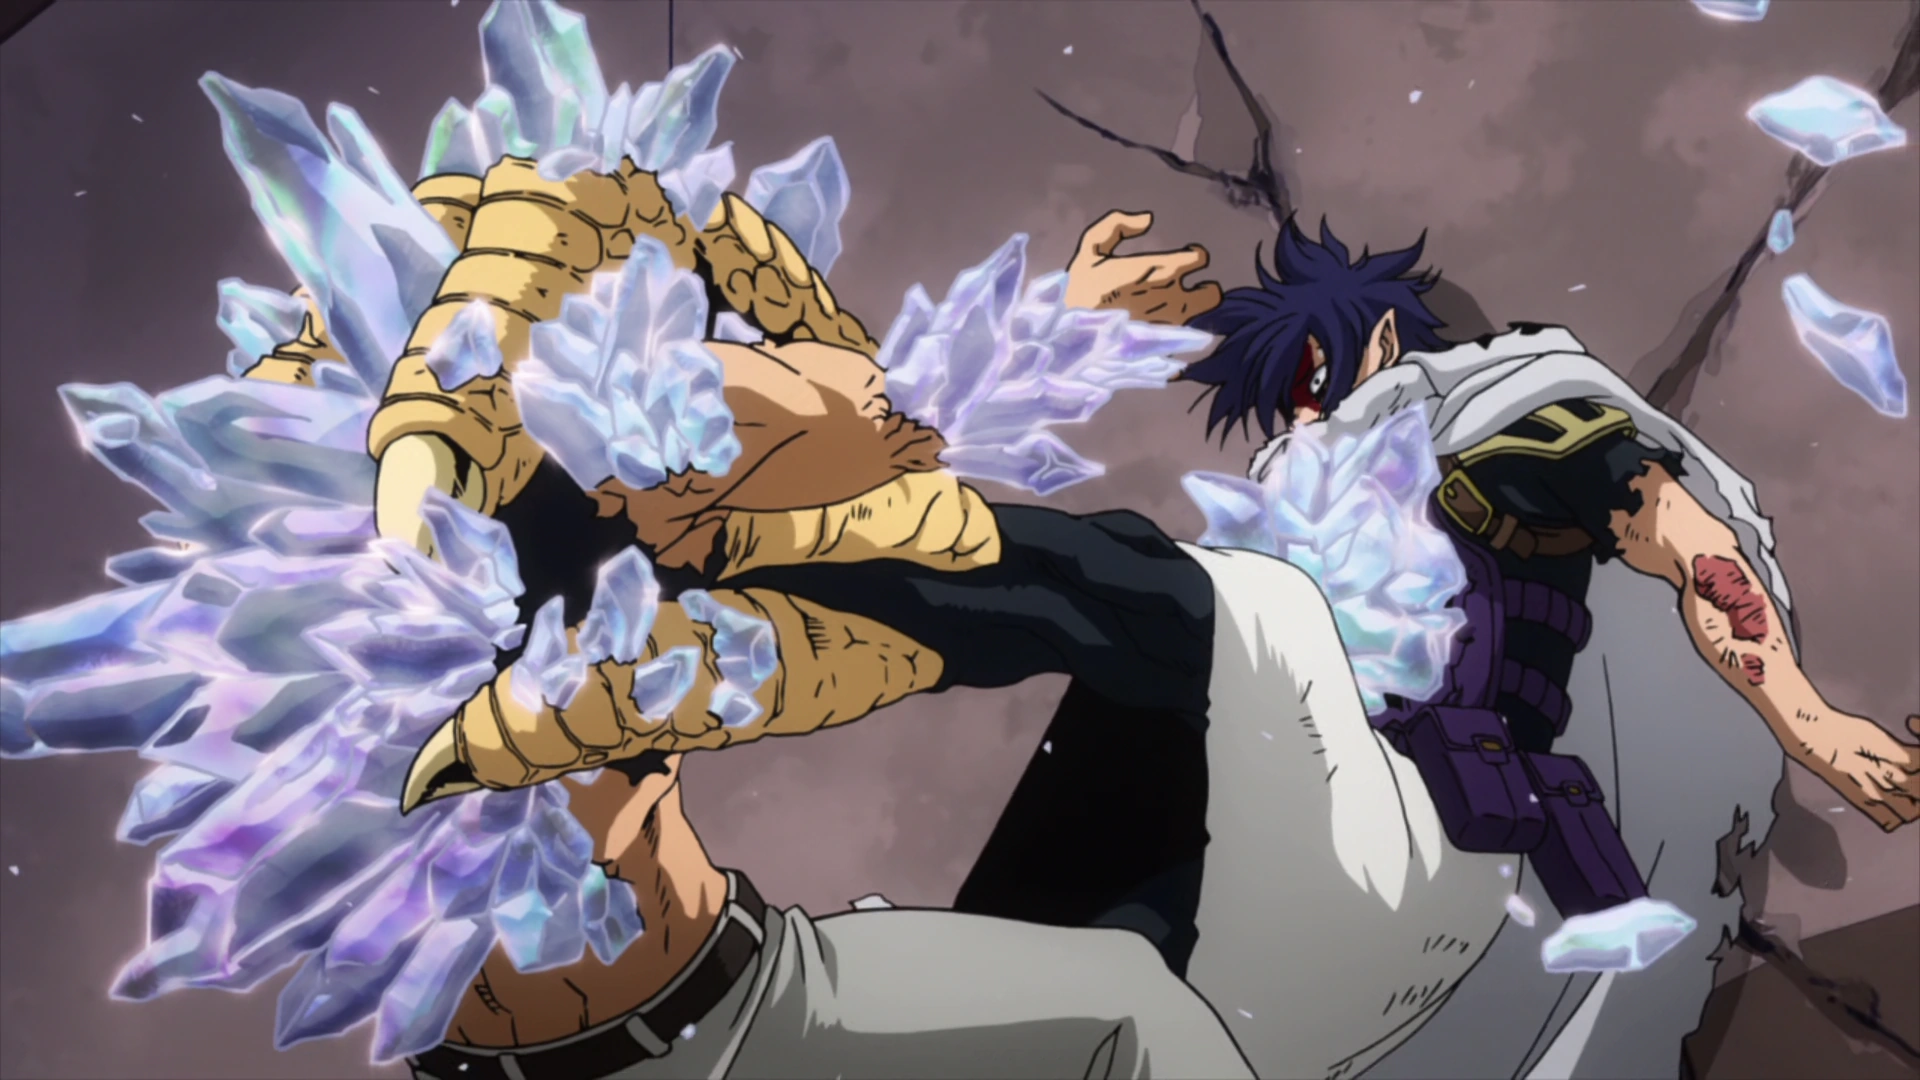
Lemillion manages to catch up with Overhaul and Chronostasis before they escape.[12] Shin Nemoto and Deidoro Sakaki ambush him while the villains take Eri away. Lemillion manages to avoid all of Shin's Quirk-Destroying Bullets and finds his resolve despite the villain's constant verbal abuse. He defeats both the villains instantly using his Super Move: Phantom Menace.
Mirio quickly catches up to Overhaul and attacks. He swipes Overhaul away and phases his foot through Eri's face to knock Chronostasis away as well. Lemillion takes Eri into his arms and promises to be her hero.[13] Overhaul activates his Quirk and attacks Lemillion and Eri. He claims he can restore Eri's body to normal whenever he wants and he's sealed off any means of escape. Chrono threatens to destroy Mirio's Quirk with the Quirk-Destroying Bullets loaded into his pistol.
Lemillion protects Eri till the end.
Lemillion evades all of Chrono's shots and wraps Eri in his cape. He disarms Chrono and launches a fierce counterattack that proves he's stronger than even Overhaul. Eri watches inspired that she might actually have a hero. Shin craws his way into the cave and Overhaul commands him to shoot Lemillion.[14]
Shin aims the bullet at Eri, knowing that Lemillion will give in to his heroic nature. Mirio jumps in front of the path of the bullet and sacrifices his Quirk to protect Eri. He promises the young girl that she'll never have to know pain again.
Overhaul taunts Mirio's efforts, only to get beat down by a Quirkless Hero who proudly claims he will always be Lemillion no matter what. Mirio fights another third of the battle without his Quirk, protecting Eri the entire time. Before Overhaul can kill Mirio, Deku and Team Nighteye burst onto the scene.[15]
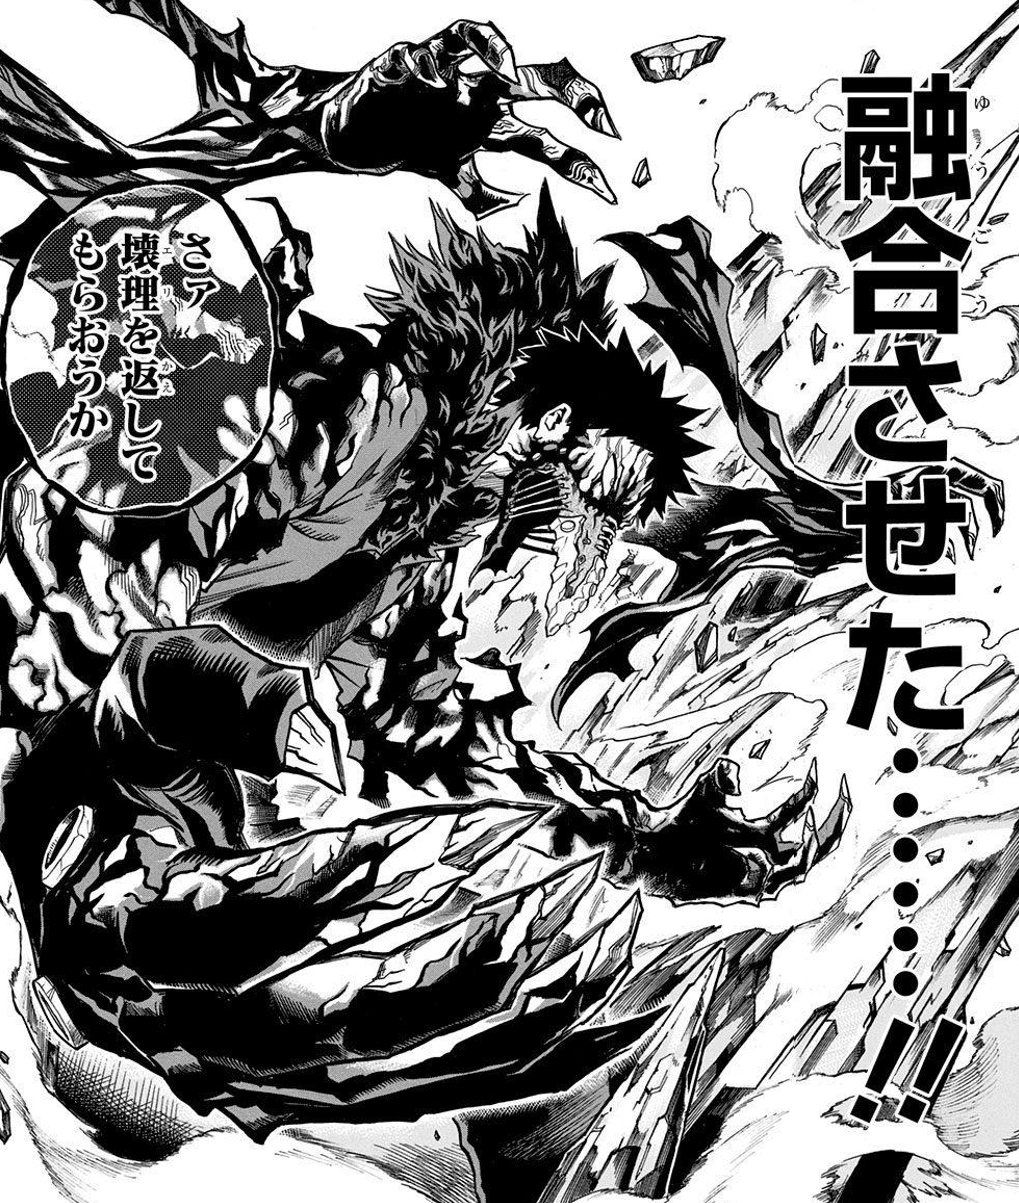
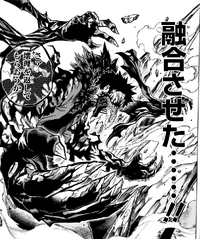
Deku, Eraser Head, and Sir Nighteye left the Police to pursue the League of Villains. Injured, Rock Lock stays behind with Mimic. The rest of Nighteye's Squad confronts Overhaul and Eraser Head takes his Quirk. Deku attacks and Overhaul is forced to wake an unconscious Chrono. Chronostasis wakes up and uses his Quirk to take Eraser Head out of the fight. Overhaul's Quirk returns to him and sacrifices Shin to fuse them together.[16]
Overhaul reveals Lemillion lost his Quirk forever and Deku tries to hold Overhaul's monstrous new form back. Sir Nighteye switches places with Deku and confronts Overhaul about fearing Lemillion's power. They engage in combat while Deku tries to escort Eri and Mirio out of the cave. Nighteye sees into Overhaul's future and has a vision of him winning and fleeing with Eri. Sir Nighteye goes past his limit and Overhaul grievously injures him. Deku rushes back into the fight, determined to defy fate.[17]
Overhaul sacrifices his humanity to ensure his vision comes true.
Deku uses 20% of One For All to combat Overhaul's second form. Despite his enhanced power, Deku proves no match for the villain and gets injured. Eri rushes out to save Deku by sacrificing herself. Before Overhaul can make a move, Ryukyu's team comes crashing through the ceiling with Rikiya.[18] Himiko and Twice lead the Heroes to the underground cave in an attempt to defy Overhaul. Overhaul captures Eri and tries to escape through the newly formed hole in the ceiling.
Eri notices Lemillion's cape and is inspired to act so she can save everyone. She awakens her power and rewinds Overhaul back to his normal human form. Eri jumps into Deku's arms and they stand up to Overhaul together.[19] Deku keeps Overhaul away from Eri and accidentally goes over his limit for One For All. However, he doesn't injure himself. Overhaul merges himself with Katsukame while Ryukyu's team tends to Sir Nighteye.
Deku realizes that Eri's Quirk can rewind any injuries he sustains while using One For All. Eri's Quirk is the ability to rewind anyone to a previous state. Deku asks that Eri lend her power to him while he accumulates enough injury to avoid getting rewinded to death. Determined to end the conflict once and for all, Deku unleashes One For All: Full Cowl - 100%![20]
Deku and Eri's last stand against Overhaul's final form.
Overhaul makes his last stand and uses his new kaiju-like form to attack Deku. In spite of his titanic power, Overhaul is easily overpowered by Deku running at 100% of One For All's power. With incredible speed, Deku can exploit Overhaul's recovery time. He barrages Overhaul with a rain of punches all firing at 100%. He finishes Overhaul with a punch that never appeared in Sir Nighteye's vision. Deku defeats Overhaul with a fist that opens the future.[21]
Overhaul attacks one last time but Eri's power explodes and rewinds him back to normal. She's unable to control her power and it spirals out of control until Eraser Head cancels out her Quirk and Deku's. They both fall unconscious, victorious at last. The mission ends at 9:15 AM the next morning.[22]
Aftermath

The League of Villains get the last laugh.
Following Overhaul's defeat, the Heroes and the Police finish the sweep of the headquarters and arrest all eleven members of the Shie Hassaikai. The villains are transported to a Villain hospital. Eijiro, Eri and Sir Nighteye are brought to a hospital as well. Before he's carried away, Sir Nighteye tells Deku that he managed to twist the future.
The Police take the villains away via the highway. They confiscate their belongings and the Quirk-Destroying Bullets. On their way to the hospital, Tomura Shigaraki and the League of Villains ambush the transport escorting Kai.[22] Dabi stops the Police escort with a flaming attack that gets intercepted by the Sand Hero: Snatch.
Snatch holds off the League of Villains until Dabi and Mr. Compress kill him. Tomura takes out the remaining Policemen and takes Kai out of the transport. He and Compress remove both of Kai's arms and steal the Quirk-Destroying Bullets. Tomura adds insult to injury and mocks Kai's life's work before the League of Villains makes a dramatic exit.[23]

Goodnight, Sir Nighteye.
The incident resulted in four destroyed homes and three injured civilians. All Heroes who received injuries are admitted into the hospital. Nejire Chan and the others remain behind to clean up the incident and aid the injured.
Deku doesn't receive treatment for anything other than light wounds and Shota gets a few stitches. Rock Lock doesn't suffer any internal damage and Fat Gum's team is expected to make full recoveries. Eri enters a fever state and is quarantined inside the building.
All Might and Recovery Girl visit Sir Nighteye on his Death Bed alongside Bubble Girl and Centipeder. Deku joins them and eventually, Mirio does as well. Sir Nighteye says his final goodbyes to his pupils and his hero All Might.[24]
Battles & Events
References
- ↑ My Hero Academia Manga: Chapter 134.
- ↑ My Hero Academia Manga: Chapter 135.
- ↑ 3.0 3.1 My Hero Academia Manga: Chapter 138.
- ↑ My Hero Academia Manga: Chapter 137.
- ↑ My Hero Academia Manga: Chapter 139.
- ↑ My Hero Academia Manga: Chapter 140.
- ↑ My Hero Academia Manga: Chapter 141.
- ↑ My Hero Academia Manga: Chapter 142.
- ↑ My Hero Academia Manga: Chapter 146.
- ↑ My Hero Academia Manga: Chapter 147.
- ↑ My Hero Academia Manga: Chapter 148.
- ↑ My Hero Academia Manga: Chapter 149.
- ↑ My Hero Academia Manga: Chapter 150.
- ↑ My Hero Academia Manga: Chapter 151.
- ↑ My Hero Academia Manga: Chapter 152.
- ↑ My Hero Academia Manga: Chapter 153.
- ↑ My Hero Academia Manga: Chapter 154.
- ↑ My Hero Academia Manga: Chapter 155.
- ↑ My Hero Academia Manga: Chapter 156.
- ↑ My Hero Academia Manga: Chapter 157.
- ↑ My Hero Academia Manga: Chapter 158.
- ↑ 22.0 22.1 My Hero Academia Manga: Chapter 159.
- ↑ My Hero Academia Manga: Chapter 160.
- ↑ My Hero Academia Manga: Chapter 161.